

Requirements you need.
- React Native Expo CLI ( I use SDK 44 )
- Laravel ( I use Laravel 7 )
- npm / yarn
- Hosting with a Domain ( You can use localhost as well if you don't have domain name and hosting)
Section 01 - React Native
Following all the steps below.
01. Create React Native Expo app
The first step you need to do is install a fresh react native expo project. Simply you can run expo init Frontend to create a new expo application. Make sure you have installed and running React native expo CLI on your computer before running this command, Otherwise you will get some errors.
Hit the following command on the terminal/Command prompt.
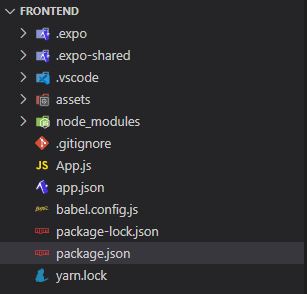
expo init Frontend02. Open the project in a code editor
In the project creating process they ask what template do you need to use.In my case I used a blank template for this project.After the project is created navigate into the project folder .If you use any command line , you can do this with cd Frontend command.
03. Download and install axios
If you are using NPM
npm install axios
Or if you are using Yarn
yarn add axios04. Create User Interface
Then open the project with your favorite code editor. In my case I used the visual studio code editor. Then open App.js file . This is the file we are going to edit
The first time when you open the App.js you can see some basic tags and stylings like below.
import { StatusBar } from 'expo-status-bar';
import { StyleSheet, Text, View} from 'react-native';

export default function App() {
  return (
    <View style={styles.container}>
      <Text>Open up App.js to start working on your app!</Text>
      <StatusBar style="auto" />
    </View>
  );
}

const styles = StyleSheet.create({
  container: {
    flex: 1,
    backgroundColor: '#fff',
    alignItems: 'center',
    justifyContent: 'center',
  },
});
But Its not essential for our project. So Remove all the codes. Before creating a UI for the app you have to import some libraries like TextInput, TouchableOpacity and some other stuff in top of the file. Then follow below code snips to create UI for our application.
Then you need import some libraries form React and React-Native.
import React,{useState} from "react;
import {
    StyleSheet,
    Text,
    View,
    TouchableOpacity,
    TextInput,
    SafeAreaView
} from 'react-native';
Then replace the App function like below.
export default function App() {

  const [name, setName] = useState("");
  const [age, setAge] = useState("");

  const setData = () => {
    // leave this blank for now
  }

  return (
    <SafeAreaView>
      <View style={styles.container}>
        <Text style={styles.label}>Name</Text>
        <TextInput
          style={styles.input}
          onChangeText={setName}
          placeholder="Enter Your Name"
          value={name}
        />
        <Text style={styles.label}>Age</Text>
        <TextInput
          style={styles.input}
          onChangeText={setAge}
          value={age}
          placeholder="Enter Your Age"
          keyboardType="numeric"
        />
        <TouchableOpacity
          style={styles.button}
          onPress={()=>setData()}
        >
          <Text style={[styles.center,styles.buttontext]}>Press Here</Text>
        </TouchableOpacity>
      </View>
    </SafeAreaView>
  );
}
Style section should change to achieve our UI goal.
const styles = StyleSheet.create({
  container:{
    paddingVertical:20,
  },
  input: {
    height: 40,
    margin: 12,
    borderWidth: 1,
    padding: 10,
  },
  label:{
    paddingHorizontal:15
  },
  button:{
    width:"30%",
    height:40,
    backgroundColor:"#f00",
    borderRadius:20,
    textAlign:'center',
    justifyContent:'center',
    alignItems:'center',
    alignSelf:"center"
  },
  center:{
    textAlign:'center',
  },
  buttontext:{
    color:"#fff"
  },
});
Section 02 - Laravel
01. Create Laravel Fresh Project
All right, at this point you have created our UI successfully. Now we are going to create Laravel backed API. In this app I use Laravel 7 . But you can use any Laravel version for this.
The first thing you have to do is install Laravel fresh project. To do that follow below all steps.
composer create-project laravel/laravel Backend 7.*
After once you downloaded a fresh project open the project in a code editor.
02. Database Connection
Create a Database using your hosting cpanel or using your localhost. Then open .env file and change database credential like below.
DB_CONNECTION=mysql
DB_HOST=127.0.0.1
DB_PORT=3306
DB_DATABASE=post1
DB_USERNAME=root
DB_PASSWORD=
03. Migrate Modal
Then open CreateUserTable Class. You can find this in database > migrations > CreateUserTable and change Up function like below.
public function up(){
    Schema::create('users', function (Blueprint $table) {
        $table->id();
        $table->string('name');
        $table->string('age');
        $table->string('email')->unique()->nullable();
        $table->timestamp('email_verified_at')->nullable();
        $table->string('password')->nullable();
        $table->rememberToken();
        $table->timestamps();
    });
}
Then migrate the tables. To do that open your terminal or CMD and run below command.
php artisan migrate
Now you can see like blow tables on your database.

04. Create a Controller
Now we need to create a controller . To do that you can run this command in your terminal. Then open in a editor. The Controller is located in
App > Http > Controllers > UserController
App > Http > Controllers > UserController
php artisan make:controller UserController
UserController should looks like this after your additions.
<?php

namespace App\Http\Controllers;

use Illuminate\Http\Request;
use App\User;

class UserController extends Controller
{
    public function index(){
        return User::all();
    }

    public function show($id){
        return User::find($id);
    }

    public function store(Request $request){
        return User::create($request->all());
    }

    public function update(Request $request, $id){
        $user = User::findOrFail($id);
        $user->update($request->all());
        return $user;
    }

    public function delete(Request $request, $id){
        $user = User::findOrFail($id);
        $user->delete();
        return 204;
    }
}
Then open user modal and modify $fillable like this. To open this modal follow this path.
App > User
App > User
protected $fillable = [
        'name', 'age','email', 'password',
    ];
05. Create Routs
Open api.php file in route.
routes > api.php
routes > api.php
Route::get('/all','UserController@index');
Route::get('/getuser/{id}','UserController@show');
Route::post('/users', 'UserController@store');
Route::put('/users/{id}', 'UserController@update');
Route::delete('users/{id}', 'UserController@delete');
Section 03 - React Native
This is our final step. In here we are going to integrate our Laravel API to React Native Expo app. Follow below code to do that.
import { StyleSheet, Text, View,TouchableOpacity,TextInput,SafeAreaView } from 'react-native';
import React,{useState,useEffect} from "react";
import axios from 'axios';

export default function App() {

  const [name, setName] = useState("");
  const [age, setAge] = useState("");
  const [users,setUsers] = useState([]);
  const [loading, setLoading] = useState(true);


  const setData = () => {
    axios.post("https://YOUR_DOMAIN/api/users", {
      name: name,
      age: age,
    })
    .then((res) => {
      axios({
        method: 'get',
        url: 'https://YOUR_DOMAIN/api/all',
      }).then((response) => {
        let apidata = response.data;
        console.log(apidata);
        if(apidata != 0){
          setUsers(apidata);
          setLoading(false);
        }else{
          setLoading(false);
        }
      });
    });
  }

  useEffect(() => {
    console.log("hi");
    axios({
      method: 'get',
      url: 'https://YOUR_DOMAIN/api/all',
    }).then((response) => {
      let apidata = response.data;
      console.log(apidata);
      if(apidata != 0){
        setUsers(apidata);
        setLoading(false);
      }else{
        setLoading(false);
      }
    });
  },[loading]);


  return (
    <SafeAreaView>
      <View style={styles.container}>
        <View style={styles.addsection}>
          <Text style={styles.label}>Name</Text>
          <TextInput
            style={styles.input}
            onChangeText={setName}
            placeholder="Enter Your Name"
            value={name}
          />
          <Text style={styles.label}>Age</Text>
          <TextInput
            style={styles.input}
            onChangeText={setAge}
            value={age}
            placeholder="Enter Your Age"
            keyboardType="numeric"
          />
          <TouchableOpacity
            style={styles.button}
            onPress={()=>setData()}
          >
            <Text style={[styles.center,styles.buttontext]}>Press Here</Text>
          </TouchableOpacity>
        </View>
        <View style={styles.viewsection}>
          {!loading &&
            users.map((item, index) => {
              return(
                <View key={index} style={styles.box}>
                  <View><Text style={styles.textViews}>Name : {item.name} | Age : {item.age}</Text></View>
                </View>
              )
            })
          }
        </View>
      </View>
    </SafeAreaView>
  );
}

const styles = StyleSheet.create({
  container:{
    paddingVertical:20,
  },
  input: {
    height: 40,
    margin: 12,
    borderWidth: 1,
    padding: 10,
  },
  label:{
    paddingHorizontal:15
  },
  button:{
    width:"30%",
    height:40,
    backgroundColor:"#f00",
    borderRadius:20,
    textAlign:'center',
    justifyContent:'center',
    alignItems:'center',
    alignSelf:"center"
  },
  center:{
    textAlign:'center',
  },
  buttontext:{
    color:"#fff"
  },
  box:{
    marginTop:20
  },
  textViews:{
    textAlign:'center'
  },
});
To run this project, run expo start command. Next Post will publish soon. User Update and Delete will include in the next post.