In this article, today we are going to learn how to learn google maps api basics within a react js project. I hope there are so many new things you can learn. If you are a beginner don’t worry. This is the best place for you. I will cover all the necessary things you should know about google maps api from a to z.
Table of content
- Explanation of what a Google Maps API key is and why it is necessary
- Overview of the steps involved in setting up a Google Maps API key
- Steps for creating a Google Cloud Platform account
- Tips for managing your billing and usage limits
- How to access the Google Maps API library in the Google Cloud Platform Console
- Steps for enabling the Google Maps API for your project
- How to create a new API key in the Google Cloud Platform Console
- Options for restricting the usage of the API key to specific domains or IP addresses
- Overview of the different ways to include the Google Maps JavaScript library in a React app
- Examples of how to pass the API key to the Google Maps library in your React component
- Recap of the steps involved in setting up a Google Maps API key and using it in a React app
- Tips for managing and troubleshooting your API key in a production environment
1.Introduction
The google maps API key is a unique identifier that authenticates requests associated with your project for usage and billing purposes. You must have at least one API key associated with your project.The API key is used to track usage of the APIs and to ensure that the terms of service are being followed. In simple terms the google maps API is a set of package pieces of code that let you quickly and easily include maps on your websites or in your mobile apps. There are so many awesome library services included.
2.Setting up a Google Cloud Platform account
Before get a google maps api key you need to have a google cloud platform account. Simply you can create an account using your gmail account
2.1 Create Google cloud platform account
Click here to create a google cloud platform account (https://cloud.google.com/) or if you already have an account login into it.
2.2 Create a Project
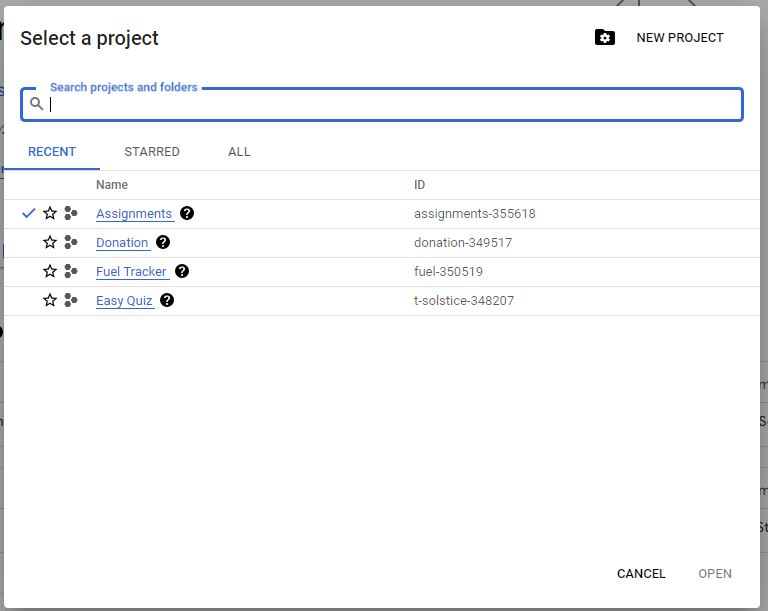
Now you are in the google cloud console portal. Here is the place to create a new project for our google maps api custom marker tutorial. To do that you just click on the dropdown which is located in the top bar. Then you will see a popup box. From that, select ‘New Project’ to create a new project. ( see attached figure below )
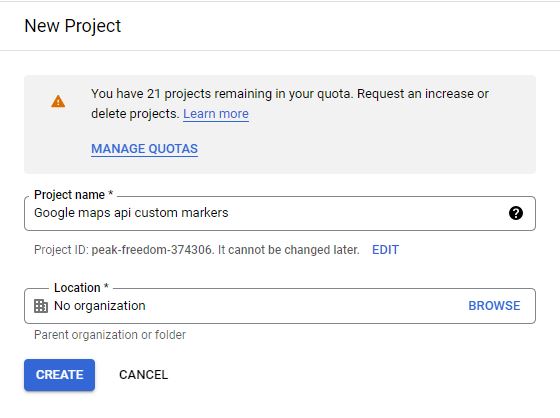
Then you will navigate to the next window. In that you can give a name for your project and click the create button. Keep the other settings as it is.
It will take several seconds to create a new project. After completing the process you will be notified by a notification. Then select the project you created from the dropdown.
3.Enabling the Google Maps API
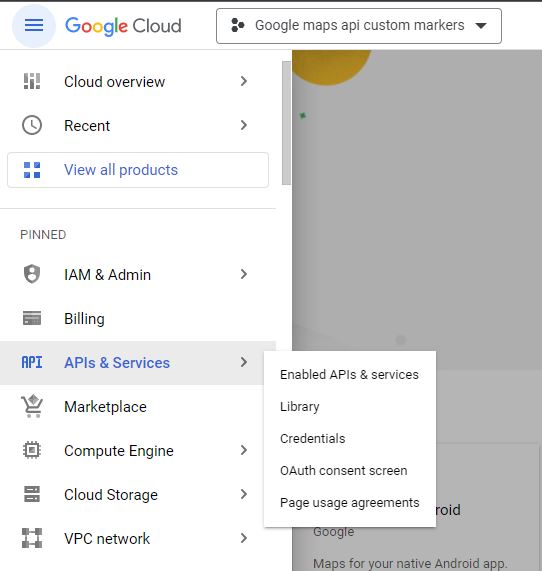
Once you have a Google Cloud Platform account and a project set up, the next step is to enable the Google Maps API for your project. To do that, click on the 3 bars ( hamburger menu) which is located in the top left corner and then select ‘APIs & Services’. Then, select the ‘Library’ from the child menu.
Now we can enable required APIs for our google maps api custom markers project. To do that search ‘Maps JavaScript API’ in the search and select. Then it will redirect to the product details page. You can enable the ‘maps javascript api’ from here.
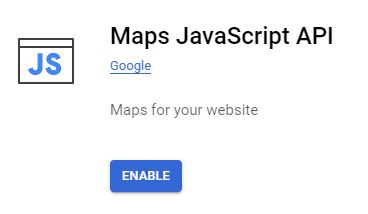
It will take several seconds to complete. Then you need to add a billing account to these services. It’s totally free. But without setting up the billing account you will not be able to use google maps api in your projects. Keep it in mind.
4.Obtaining the Google maps API key
It’s time to get your api key. To do this, again click on the 3 bars ( hamburger menu) which is located in the top left corner and then select ‘APIs & Services’. But this time, select the ‘Credentials’ from the child menu.
Then it will automatically redirect to the Credentials page. From this page click on the ‘Create Credentials’ button and then select ‘API’ Key.

If you need a video tutorial for the above steps. Please follow the video below.
5.Using the API key in a React app
We have successfully set up our API keys at this stage. Now we need to install a fresh React js app.
5.1 Install React Js Project
npx create-react-app my-app
5.2 Install Google maps API library
npm i @react-google-maps/api
5.3 Install Bootstrap
First of all we need to add bootstrap for our project. The purpose of using bootstrap is to make it easy to add styles. Nothing else. There are 2 ways to add bootstrap into your projects.
- Use npm/yarn package
- Use CND
In this article I used the 2nd method. You also can use this. To do this copy below code segment and page into your index.html file’s head tag
<link href="https://cdn.jsdelivr.net/npm/bootstrap@5.2.0-beta1/dist/css/bootstrap.min.css" rel="stylesheet"    integrity="sha384-0evHe/X+R7YkIZDRvuzKMRqM+OrBnVFBL6DOitfPri4tjfHxaWutUpFmBp4vmVor" crossorigin="anonymous">
<script src="https://cdn.jsdelivr.net/npm/bootstrap@5.2.0-beta1/dist/js/bootstrap.bundle.min.js"    integrity="sha384-pprn3073KE6tl6bjs2QrFaJGz5/SUsLqktiwsUTF55Jfv3qYSDhgCecCxMW52nD2" crossorigin="anonymous"></script>
Here is the official documentation if you need anything need to know about bootstrap https://getbootstrap.com/docs/5.3/getting-started/introduction/
5.4 Google Maps Integration
Now we are going to import google maps api library into our react js project.
import {
  useJsApiLoader,
  GoogleMap,
  Marker,
  InfoWindow,
} from "@react-google-maps/api";
Then we also need a useState hook. So we also need to import it.
import { useState } from "react"
Then we need to have a center point for your map.This also should be a json object.
const center = {
  lat: 6.9271,
  lng: 79.8612,
};
We are going to load API and add google maps API key into our project. To do this we use useJsApiLoader function. You can copy and paste below code snippet into your app.js file inside the app() function.
const { isLoaded } = useJsApiLoader({
    id: "google-map-script",
    googleMapsApiKey: "YOUR_GOOGLE_MAPS_API_KEY",
  });
It’s time to load the map in our project. We use GoogleMap For this.
<GoogleMap
        center={center}
        zoom={8}
        mapContainerStyle={{ width: "100%", height: "100vh" }}
        options={{
          zoomControl: false,
          streetViewControl: false,
          mapTypeControl: false,
          fullscreenControl: false,
}}>
</GoogleMap>
Full App.js
import {  useState } from "react";
import {
  useJsApiLoader,
  GoogleMap,
  Marker,
  InfoWindow,
} from "@react-google-maps/api";

const center = {
  lat: 6.9271,
  lng: 79.8612,
};

function App() {
  const { isLoaded } = useJsApiLoader({
    id: "google-map-script",
    googleMapsApiKey: "YOUR_GOOGLE_MAPS_API_KEY",
  });

  const markers = [
    {
      id: 1,
      position: { lat: 6.9271, lng:79.8612 }
    },
    {
      id: 2,
      position: { lat: 7.9570, lng: 80.7603 }
    },
    {
      id: 3,
      position: { lat: 6.8768, lng: 81.0608 }
    },
    {
      id: 4,
      position: { lat: 6.0187, lng: 0.2394 }
    },
    {
      id: 5,
      position: { lat: 6.781790858643255, lng:  81.01646865947944 }
    },
    {
      id: 6,
      position: { lat: 7.293587710691421, lng: 80.6413357264653 }
    }
  ];


  return isLoaded ? (
    <>
      <GoogleMap
        center={center}
        zoom={8}
        mapContainerStyle={{ width: "100%", height: "100vh" }}
        options={{
          zoomControl: false,
          streetViewControl: false,
          mapTypeControl: false,
          fullscreenControl: false,
        }}
      >
      </GoogleMap>
    </>
  ) : (
    <></>
  );
}
export default App;
Now the run project
npm start
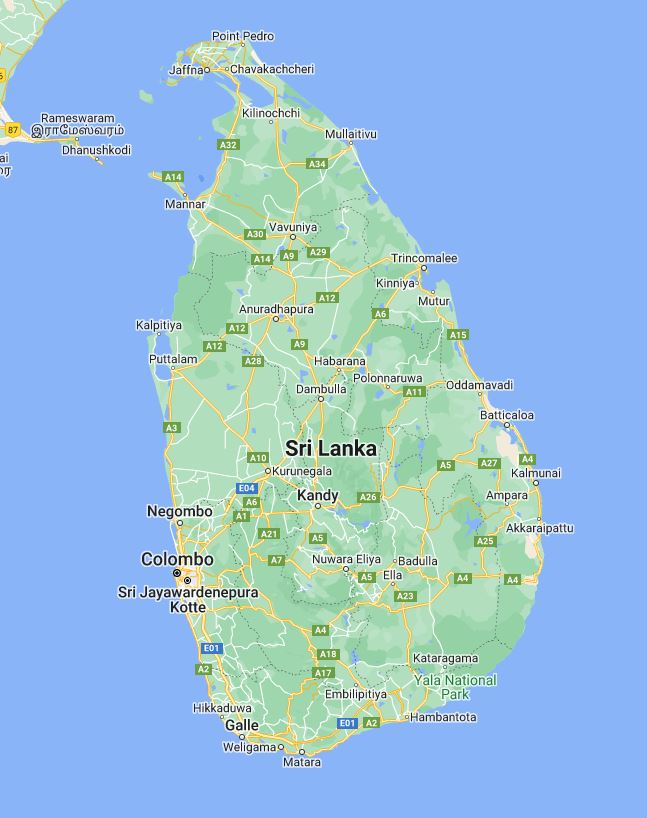
You can see an empty map like below if you have followed the above steps correctly.
5.5 Add Markes
Before adding markers in google maps we need some locations to display. So I selected some tourist attractions in Sri Lanka. You can have your own list. I attached my list below. This list should be a json object. It should contain the longitude and latitude of your location in below order.
const markers = [
    {
      id: 1,
      position: { lat: 6.9271, lng:79.8612 }
    },
    {
      id: 2,
      position: { lat: 7.9570, lng: 80.7603 }
    },
    {
      id: 3,
      position: { lat: 6.8768, lng: 81.0608 }
    },
    {
      id: 4,
      position: { lat: 6.0187, lng: 0.2394 }
    },
    {
      id: 5,
      position: { lat: 6.781790858643255, lng:  81.01646865947944 }
    },
    {
      id: 6,
      position: { lat: 7.293587710691421, lng: 80.6413357264653 }
    }
];
Now we need to attach the above locations into our map. We can use the Marker tag to do that. The markers in a json object. So we need to use the map feature.
{markers.map(({ id, name, position }) => (
    <Marker
    key={id}
    position={position}
    >
    </Marker>
))}
Full App.js
import {  useState } from "react";
import {
  useJsApiLoader,
  GoogleMap,
  Marker,
  InfoWindow,
} from "@react-google-maps/api";

const center = {
  lat: 6.9271,
  lng: 79.8612,
};

function App() {
  const { isLoaded } = useJsApiLoader({
    id: "google-map-script",
    googleMapsApiKey: "YOUR_GOOGLE_MAPS_API_KEY",
  });

 const markers = [
    {
      id: 1,
      position: { lat: 6.9271, lng:79.8612 }
    },
    {
      id: 2,
      position: { lat: 7.9570, lng: 80.7603 }
    },
    {
      id: 3,
      position: { lat: 6.8768, lng: 81.0608 }
    },
    {
      id: 4,
      position: { lat: 6.0187, lng: 0.2394 }
    },
    {
      id: 5,
      position: { lat: 6.781790858643255, lng:  81.01646865947944 }
    },
    {
      id: 6,
      position: { lat: 7.293587710691421, lng: 80.6413357264653 }
    }
  ];

  return isLoaded ? (
    <>
      <GoogleMap
        center={center}
        zoom={8}
        mapContainerStyle={{ width: "100%", height: "100vh" }}
        options={{
          zoomControl: false,
          streetViewControl: false,
          mapTypeControl: false,
          fullscreenControl: false,
        }}
      >
        {markers.map(({ id, name, position }) => (
          <Marker
            key={id}
            position={position}
          >
          </Marker>
        ))}
      </GoogleMap>
    </>
  ) : (
    <></>
  );
}
export default App;
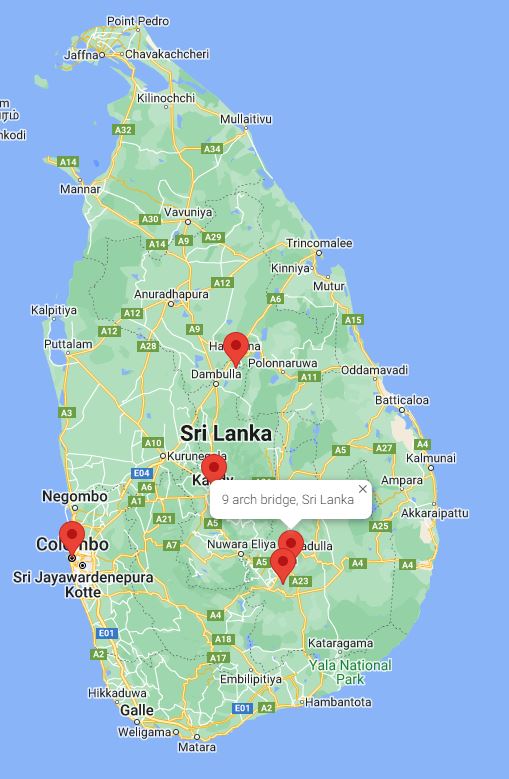
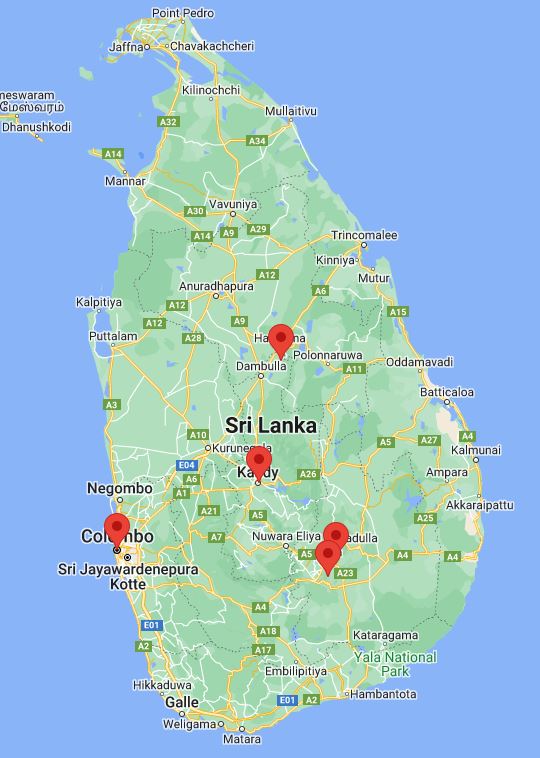
If you follow all the above steps, you will see a result like below.
5.6 Add Information box
Add state to set and get the active status of marker.
const [activeMarker, setActiveMarker] = useState(null);
Now, To add information boxes to each marker, first we need to add information in our markers object like below.
const markers = [
    {
      id: 1,
      name: "Colombo, Sri Lanka",
      position: { lat: 6.9271, lng:79.8612 }
    },
    {
      id: 2,
      name: "Sigiriya Rock, Sri Lanka",
      position: { lat: 7.9570, lng: 80.7603 }
    },
    {
      id: 3,
      name: "9 arch bridge, Sri Lanka",
      position: { lat: 6.8768, lng: 81.0608 }
    },
    {
      id: 4,
      name: "Jungle Beach, Sri Lanka",
      position: { lat: 6.0187, lng: 0.2394 }
    },
    {
      id: 5,
      name: "Lipton Seat Tea Platations, Sri Lanka",
      position: { lat: 6.781790858643255, lng:  81.01646865947944 }
    },
    {
      id: 6,
      name: "Temple of tooth relic, Kandy Sri Lanka",
      position: { lat: 7.293587710691421, lng: 80.6413357264653 }
    }
  ]
Add handler function to handle the active status of map marker.
const handleActiveMarker = (marker) => {
    if (marker === activeMarker) {
      return;
    }
    setActiveMarker(marker);
};
Then attach the information into the marker like below.
<GoogleMap
    center={center}
    zoom={8}
    mapContainerStyle={{ width: "100%", height: "100vh" }}
    options={{
      zoomControl: false,
      streetViewControl: false,
      mapTypeControl: false,
      fullscreenControl: false,
    }}
    onClick={() => setActiveMarker(null)}
  >
    {markers.map(({ id, name, position }) => (
      <Marker
        key={id}
        position={position}
        onClick={() => handleActiveMarker(id)}
      >
        {activeMarker === id ? (
          <InfoWindow onCloseClick={() => setActiveMarker(null)}>
            <div>{name}</div>
          </InfoWindow>
        ) : null}
      </Marker>
    ))
</GoogleMap>
Full app.js
import {  useState } from "react";
import {
  useJsApiLoader,
  GoogleMap,
  Marker,
  InfoWindow,
} from "@react-google-maps/api";

const center = {
  lat: 6.9271,
  lng: 79.8612,
};

function App() {
  const { isLoaded } = useJsApiLoader({
    id: "google-map-script",
    googleMapsApiKey: "YOUR_GOOGLE_MAPS_API_KEY",
  });

  const markers = [
    {
      id: 1,
      name: "Colombo, Sri Lanka",
      position: { lat: 6.9271, lng:79.8612 }
    },
    {
      id: 2,
      name: "Sigiriya Rock, Sri Lanka",
      position: { lat: 7.9570, lng: 80.7603 }
    },
    {
      id: 3,
      name: "9 arch bridge, Sri Lanka",
      position: { lat: 6.8768, lng: 81.0608 }
    },
    {
      id: 4,
      name: "Jungle Beach, Sri Lanka",
      position: { lat: 6.0187, lng: 0.2394 }
    },
    {
      id: 5,
      name: "Lipton Seat Tea Platations, Sri Lanka",
      position: { lat: 6.781790858643255, lng:  81.01646865947944 }
    },
    {
      id: 6,
      name: "Temple of tooth relic, Kandy Sri Lanka",
      position: { lat: 7.293587710691421, lng: 80.6413357264653 }
    }
  ];

  const [activeMarker, setActiveMarker] = useState(null);
  const handleActiveMarker = (marker) => {
    if (marker === activeMarker) {
      return;
    }
    setActiveMarker(marker);
  };


  return isLoaded ? (
    <>
      <GoogleMap
        center={center}
        zoom={8}
        mapContainerStyle={{ width: "100%", height: "100vh" }}
        options={{
          zoomControl: false,
          streetViewControl: false,
          mapTypeControl: false,
          fullscreenControl: false,
        }}
        onClick={() => setActiveMarker(null)}
      >
        {markers.map(({ id, name, position }) => (
          <Marker
            key={id}
            position={position}
            onClick={() => handleActiveMarker(id)}
          >
            {activeMarker === id ? (
              <InfoWindow onCloseClick={() => setActiveMarker(null)}>
                <div>{name}</div>
              </InfoWindow>
            ) : null}
          </Marker>
        ))}
      </GoogleMap>
    </>
  ) : (
    <></>
  );
}
export default App;
You will get a result like below after all the steps.