In this article we are going to learn how to implement a Realtime location tracking feature in a react js app with google maps. I hope this feature is very useful for you all and I’m going to use several technologies to build this product. To get a better idea of implementing real time tracking you have to read this article from start to end.
Before starting this, if you need some ideas on how to use google maps api within the react project, I recommend you to read this article first.
In this build we are going to use firebase, google maps api and react js.
Table of content
- Definition of real-time location tracking
- Importance of real-time location tracking in mobile applications
- Overview of React JS and React Native
- What is React JS
- What is React Native
- Differences between React JS and React Native
- Setting up the project
- Implementing location tracking
- Testing the implementation
- Setting up the project
- Installing dependencies
- Implementing location tracking
- Testing the implementation
- Summary of the article
- Future scope of real-time location tracking with React JS and React Native
1. Introduction
What is real time location tracking ?
Real-time location tracking is a solution to many modern problems. It is not a new concept, but it has been dramatically improved in recent years. The technology used to be expensive and challenging to implement, but the cost of technology has gone down, and consumers can now enjoy the benefits of real-time location tracking.It is used in many ways today. Businesses use it to keep track of delivery trucks and employees. People use it to keep track of their children or pets while they are out exploring the world. It can also be used for safety when traveling or on vacation. There are many other uses for real-time location tracking as well. Real-time location tracking can also be used for entertainment, like keeping track of a favorite sports team or finding out where your favorite band plays next on tour.
Ways of Realtime location tracking
There are many ways have to track the location realtime such as using GPS, Mobile Number, IP and many more. However in this article we are going to learn tracking location with GPS. There are several requirements needed to create this application.
- A tracking device
- Database to store current location
- A Map
2. Understanding React JS , React Native and Firebase
React Native :-
If we have a customizable gps tracking device, it would be good. If you don’t have one, don’t worry we can use our mobile phone as a tracking device, but in this case we have to do some more things. We need to develop a mobile application to share the location into our database. It sounds much more complicated, but actually it’s not. We use react native to develop this app.
React Js :-
On the other end we need a map to display the live location of the tracked device. We can use React Js to implement this feature.
Firebase :-
This is the most important part in this project. Because we are going to use firebase’s realtime database and this is our backend for both react and react native apps. It’s very useful and the most important thing is it’s very easy to use.
3. Integrating Realtime location tracking in React JS
3.1.Setting up a Google Cloud Platform account
Before get a google maps api key you need to have a google cloud platform account. Simply you can create an account using your gmail account.
3.1.1 Create Google cloud platform account
Click here to create a google cloud platform account (https://cloud.google.com/) or if you already have an account login into it.
3.1.2 Create a Project
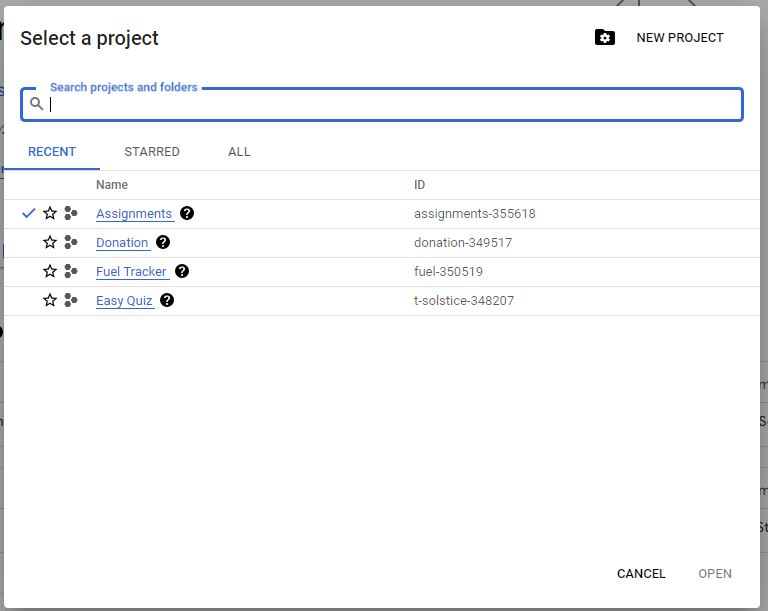
Now you are in the google cloud console portal. Here is the place to create a new project for our google maps api custom marker tutorial. To do that you just click on the dropdown which is located in the top bar. Then you will see a popup box. From that, select ‘New Project’ to create a new project. ( see attached figure below )
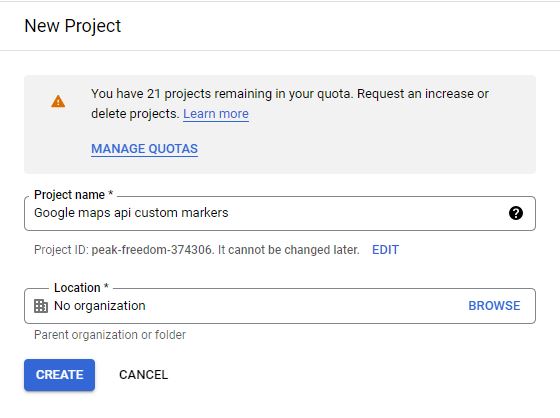
Then you will navigate to the next window. In that you can give a name for your project and click the create button. Keep the other settings as it is.
It will take several seconds to create a new project. After completing the process you will be notified by a notification. Then select the project you created from the dropdown.
3.2.Enabling the Google Maps API
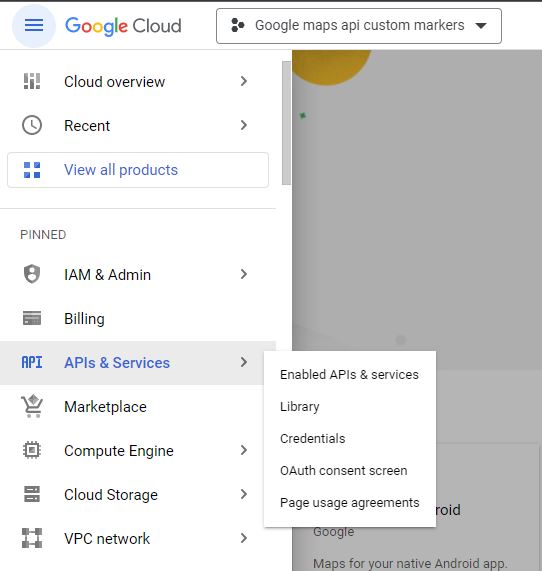
Once you have a Google Cloud Platform account and a project set up, the next step is to enable the Google Maps API for your project. To do that, click on the 3 bars ( hamburger menu) which is located in the top left corner and then select ‘APIs & Services’. Then, select the ‘Library’ from the child menu.
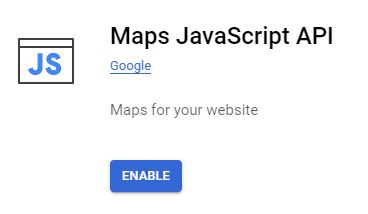
Now we can enable required APIs for our google maps api custom markers project. To do that search ‘Maps JavaScript API’ in the search and select. Then it will redirect to the product details page. You can enable the ‘maps javascript api’ from here.
It will take several seconds to complete. Then you need to add a billing account to these services. It’s totally free. But without setting up the billing account you will not be able to use google maps api in your projects. Keep it in mind.
3.3.Obtaining the Google maps API key
It’s time to get your api key. To do this, again click on the 3 bars ( hamburger menu) which is located in the top left corner and then select ‘APIs & Services’. But this time, select the ‘Credentials’ from the child menu.
Then it will automatically redirect to the Credentials page. From this page click on the ‘Create Credentials’ button and then select ‘API’ Key.

If you need a video tutorial for the above steps. Please follow the video below.
3.4.Using the API key in a React app
We have successfully set up our API keys at this stage. Now we need to install a fresh React js app.
3.4.1 Install React Js Project
npx create-react-app my-app
3.4..2 Install Google maps API library
npm i @react-google-maps/api3.4..3 Install Bootstrap
First of all we need to add bootstrap for our project. The purpose of using bootstrap is to make it easy to add styles. Nothing else. There are 2 ways to add bootstrap into your projects.
- Use npm/yarn package
- Use CND
In this article I used the 2nd method. You also can use this. To do this copy below code segment and page into your index.html file’s head tag.
<link href="https://cdn.jsdelivr.net/npm/bootstrap@5.2.0-beta1/dist/css/bootstrap.min.css" rel="stylesheet"    integrity="sha384-0evHe/X+R7YkIZDRvuzKMRqM+OrBnVFBL6DOitfPri4tjfHxaWutUpFmBp4vmVor" crossorigin="anonymous">
<!-- JavaScript Bundle with Popper -->
<script src="https://cdn.jsdelivr.net/npm/bootstrap@5.2.0-beta1/dist/js/bootstrap.bundle.min.js"    integrity="sha384-pprn3073KE6tl6bjs2QrFaJGz5/SUsLqktiwsUTF55Jfv3qYSDhgCecCxMW52nD2" crossorigin="anonymous"></script>
Here is the official documentation if you need anything need to know about bootstrap https://getbootstrap.com/docs/5.3/getting-started/introduction/
3.5 Google Maps Integration
Now we are going to import google maps api library into our react js project.
import {
  useJsApiLoader,
  GoogleMap,
  Marker,
  InfoWindow,
} from "@react-google-maps/api";
Then we also need a useState hook. So we also need to import it.
import { useState } from "react"
Then we need to have a center point for your map.This also should be a json object.
const center = {
  lat: 6.9271,
  lng: 79.8612,
};
We are going to load API and add google maps API key into our project. To do this we use useJsApiLoader function. You can copy and paste below code snippet into your app.js file inside the app() function.
const { isLoaded } = useJsApiLoader({
    id: "google-map-script",
    googleMapsApiKey: "YOUR_GOOGLE_MAPS_API_KEY",
});
It’s time to load the map in our project. We use GoogleMap For this.
<GoogleMap
        center={center}
        zoom={8}
        mapContainerStyle={{ width: "100%", height: "100vh" }}
        options={{
          zoomControl: false,
          streetViewControl: false,
          mapTypeControl: false,
          fullscreenControl: false,
}}>
</GoogleMap>
Full App.js
import {  useState } from "react";
import {
  useJsApiLoader,
  GoogleMap,
  Marker,
  InfoWindow,
} from "@react-google-maps/api";


const center = {
  lat: 6.9271,
  lng: 79.8612,
};


function App() {
  const { isLoaded } = useJsApiLoader({
    id: "google-map-script",
    googleMapsApiKey: "YOUR-API-KEY",
  });
  return isLoaded ? (
    <>
      <GoogleMap
        center={center}
        zoom={8}
        mapContainerStyle={{ width: "100%", height: "100vh" }}
        options={{
          zoomControl: false,
          streetViewControl: false,
          mapTypeControl: false,
          fullscreenControl: false,
        }}
      >
      </GoogleMap>
    </>
  ) : (
    <></>
  );
}
export default App;
Now run project.
npm start
You can see an empty map like below if you have followed the above steps correctly.
3.6 Integrate Firebase
3.6.1 Create a Firebase Account
To begin, if you do not have a Firebase account, navigate to the Firebase website here (https://console.firebase.google.com/) and sign up for one. Once you have an account, create a new project and input the necessary details.
Step 1
Click ‘create a project’ button.
Step 2
Give a name for the project and then continue.
Step 3
Continue.
Step 4
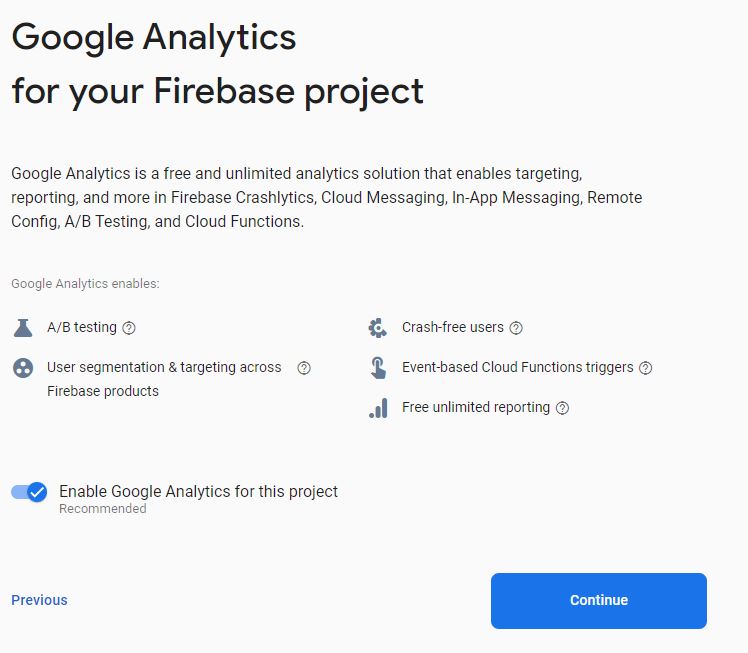
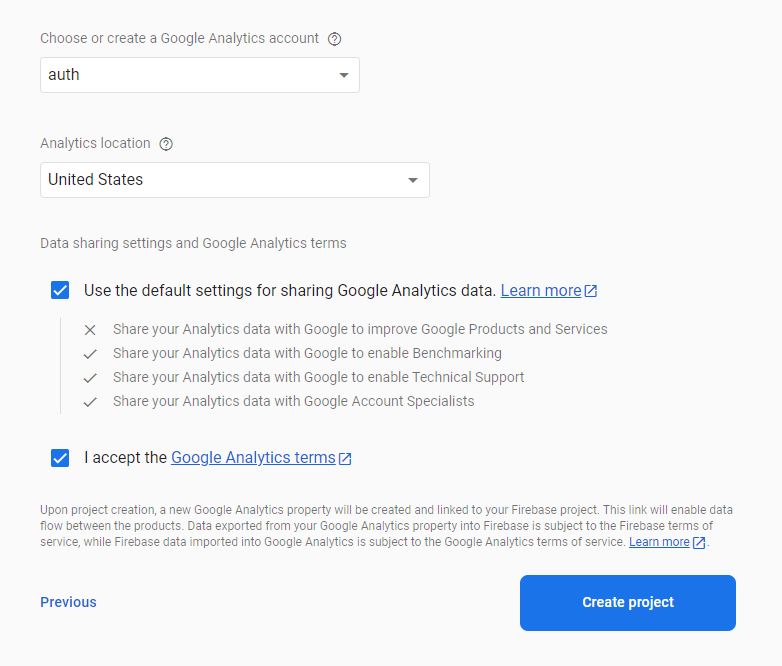
Then create a new analytics account by giving a name from the given dropdown list and then select. In my case I used ‘gmap’ as the name of my google analytics account.
Step 5
Now select an analytics location and check the checkbox to agree their terms and conditions. Then click the ‘create project’ button.
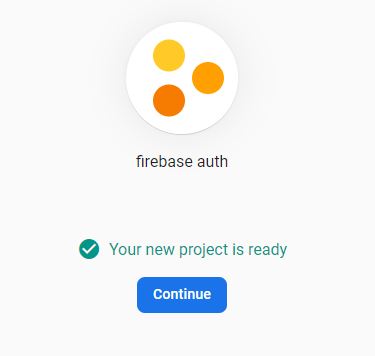
Within several seconds your project will create. Then click continue.
3.6.2 Configure Firebase Realtime Database
It’s time to create a firebase realtime database. To enable create this services.
Step 1 :- First Click on the ‘build’ from the left side bar.

Then select ‘Realtime Database’ from the list. Then create a database. After creating a database you have to change some rules on this database. To do that, navigate to the ‘Rules’ tab. Then change the rules like below.
{
  "rules": {
    ".read": true,
    ".write": true
  }
}
Then publish it.
3.6.3 Add a sample recorde
Now navigate to the ‘Data’ tab again and add a sample recorde like below.

3.7 Install firebase in the react project.
npm install firebase3.8 Configure firebase in the react project.
After your successful installation,
Create a folder called ‘firebase_setup’ and create a file called ‘firebase.js’ inside the created folder. Then add below details into that file. Replace with your details. You can find this details form the project settings.
firebase.js
import { initializeApp } from "firebase/app";
import { getDatabase } from "firebase/database";


const firebaseConfig = {
  apiKey: "Your-API-Key",
  authDomain: "Your-auth-domain",
  projectId: "your-project-id",
  storageBucket: "your-storage-bucket",
  messagingSenderId: "your-sender-id",
  appId: "your-app-id",
  measurementId: "your–messure-id",
};


const app = initializeApp(firebaseConfig);
const database = getDatabase(app);
3.9 Use firebase
First of all we need to import our firebase.js into our working file. In my case its app.js
import db from "./firebase_setup/firebase";
Then we need a state to store our current location values.
const [currentLocation,setCurrentLocation] = useState([]);
Now we can get the data from firebase.
const fetchdata = async () => {
    const starCountRef = ref(db, "location/");
    onValue(starCountRef, (snapshot) => {
      const data = snapshot.val();
      setCurrentLocation(data);
      console.log(data);
    });
};
Then we can simply call this function inside our useEffect hook. Before that make sure you imported the useEffect. Otherwise you will get an error.
useEffect(() => {
    fetchdata();
}, []);
Now you can add your live location as a marker inside the map like below. if you wish to use any custom marker, import it first.
import car from './car.png';<Marker position={currentLocation} icon={car}>
</Marker>
Image that I used as custom marker icon.
Full App.js file
import React, { useState, useEffect } from "react";
import db from "./firebase_setup/firebase";
import { getDatabase, ref, onValue } from "firebase/database";
import car from './car.png';
import {
  useJsApiLoader,
  GoogleMap,
  Marker,
} from "@react-google-maps/api";

const center = {
  lat: 6.9271,
  lng: 79.8612,
};

function App() {

  const db = getDatabase();

  const { isLoaded } = useJsApiLoader({
    id: "google-map-script",
    googleMapsApiKey: "YOUR-API-KEY",
  });

  const [currentLocation,setCurrentLocation] = useState([]);

  const fetchdata = async () => {
    const starCountRef = ref(db, "location/");
    onValue(starCountRef, (snapshot) => {
      const data = snapshot.val();
      setCurrentLocation(data);
      console.log(data);
    });
  };

  useEffect(() => {
    fetchdata();
  }, []);

  return isLoaded ? (
    <>
      <GoogleMap
        center={center}
        zoom={8}
        mapContainerStyle={{ width: "100%", height: "100vh" }}
        options={{
          zoomControl: false,
          streetViewControl: false,
          mapTypeControl: false,
          fullscreenControl: false,
        }}
      >
        <Marker position={currentLocation}>
        </Marker>
      </GoogleMap>
    </>
  ) : (
    <></>
  );
}

export default App;
You have successfully integrated live location into google map. Now you can test the project by changing the location from the firebase database.
4. Integrating Realtime location tracking in React Native
In this project we use our mobile phone as our tracking device. So, first create a new expo project.
npx create-expo-app Tracker
Cd Tracker
Then install firebase into it.
npm install firebase
Then install expo location library.
npx expo install expo-location
Import essential libraries like below.
import { initializeApp } from 'firebase/app';
import { getDatabase, ref, onValue, set , push ,update   } from 'firebase/database';
import * as Location from "expo-location";
import React, { useState } from "react";
import { Button, Text, View } from "react-native";
Now you can use the same configurations that we used before section like below.
const firebaseConfig = {
    apiKey: "your-api-key",
    authDomain: "your-auth-domain",
    databaseURL: "your-database-url",
    projectId: "your-project-id",
    storageBucket: "your-storage-bucket",
    messagingSenderId: "your-sender-id",
    appId: "your-app-id",
};

initializeApp(firebaseConfig);
Create 2 states to store location and errors.
const [location, setLocation] = useState(null);
const [errorMsg, setErrorMsg] = useState(null);
Share location function should be like below.
const saveLocation = async () => {

    const intervalId = setInterval(async () => {
      let { status } = await Location.requestForegroundPermissionsAsync();
      if (status !== "granted") {
        setErrorMsg("Permission to access location was denied");
      }

      let location = await Location.getCurrentPositionAsync({});
      setLocation(location);

      const db = getDatabase();
      const referenceFuel = ref(db, 'location/');
      update(referenceFuel, {
        lat: location.coords.latitude,
        lng: location.coords.longitude,
      });

    }, 5000);

    return () => clearInterval(intervalId);
};
In my case I share my location every 5 seconds.. (5000 milliseconds). You can choose your interval as you wish.
Full App.js
import { initializeApp } from 'firebase/app';
import { getDatabase, ref, onValue, set , push ,update   } from 'firebase/database';
import * as Location from "expo-location";
import React, { useState } from "react";
import { Button, Text, View } from "react-native";

export default function App() {
  const firebaseConfig = {
    apiKey: "your-api-key",
    authDomain: "your-auth-domain",
    databaseURL: "your-database-url",
    projectId: "your-project-id",
    storageBucket: "your-storage-bucket",
    messagingSenderId: "your-sender-id",
    appId: "your-app-id",
  };

  initializeApp(firebaseConfig);

  const [location, setLocation] = useState(null);
  const [errorMsg, setErrorMsg] = useState(null);

  const saveLocation = async () => {

    const intervalId = setInterval(async () => {
      let { status } = await Location.requestForegroundPermissionsAsync();
      if (status !== "granted") {
        setErrorMsg("Permission to access location was denied");
      }

      let location = await Location.getCurrentPositionAsync({});
      setLocation(location);

      const db = getDatabase();
      const referenceFuel = ref(db, 'location/');
      update(referenceFuel, {
        lat: location.coords.latitude,
        lng: location.coords.longitude,
      });

    }, 5000);

    return () => clearInterval(intervalId);
  };


  return (
    <View>
      <Text>Latitude: {location?.coords.latitude}</Text>
      <Text>Longitude: {location?.coords.longitude}</Text>
      {errorMsg ? <Text>{errorMsg}</Text> : null}
      <Button title="Share Location" onPress={saveLocation} />
    </View>
  );
}
5. Conclusion
In conclusion, real-time location tracking is a crucial component in today’s mobile applications and can bring a lot of benefits to businesses and users. Integrating location tracking in React JS and React Native applications is not only straightforward but also offers a wide range of possibilities for customization and optimization. By understanding the differences between React JS and React Native and following best practices for accuracy, privacy, and performance, developers can create efficient and user-friendly real-time location tracking applications. As technology continues to advance, it’s likely that real-time location tracking will play an even greater role in the future, and React JS and React Native will continue to be popular choices for developers looking to build location-based applications.