Hello everyone, today we are going to learn about develop Chrome Extensions to achieve Text To Speech (TTS) task. This text-to-speech extension, users can have articles and other web pages read aloud to them, making it easier to consume content on the go or for those with reading impairments. That is the main feature of this chrome extension.
Table of content
- Brief overview of text-to-speech technology
- Description of the purpose and potential uses of a text-to-speech Chrome extension
- Installation of necessary tools (e.g. Chrome browser, text editor)
- Creation of a new Chrome extension project
- Integration of a text-to-speech
- Implementation of the extension's features (e.g. button to trigger text-to-speech, options to select voice and language)
- Testing the extension's functionality in the Chrome browser
- Debugging any issues that arise
- Recap of the steps involved in developing a text-to-speech Chrome extension
- Tips for future development or customization of the extension
I. Introduction - Chrome Extensions & Text To Speech
What are the Chrome extensions?
Chrome extensions are small software programs that are used to make the user experience of the browser easy. These kinds of programs are developed using web technologies such as HTML, CSS, and JavaScript, and can be easily installed from the Chrome Web Store.
What is Text to speech (TTS)?
Text to speech is the abbreviation of Text to Speech, a technology that converts text to voice. It has different applications: it could be used to create a voiceover for a video or to help people with visual problems to “read” texts.
Why do I need chrome extensions text to speech ?
The purpose of developing Chrome extensions for text-to-speech is to provide a convenient and accessible way for users to consume web content. With a text-to-speech extension, users can have articles and other web pages read aloud to them, making it easier to consume content on the go or for those with reading impairments. Additionally, a text-to-speech Chrome extension can provide a more engaging and interactive experience for users, allowing them to multitask or engage with the content in a new way. Overall, the development of a text-to-speech Chrome extension can greatly enhance the user experience and accessibility of the web.
In this article we are going to create a simple chrome extensions to make text to speech for medium’s blog articles.
Official documentation of google chrome extensions here
II. Setting up the development environment
Folder Structure
Before starting the build of chrome extension, we have to create a new folder and re-named it as ‘Text To Voice’. By the way you can have any name. Then we need to create some essential files inside this folder.
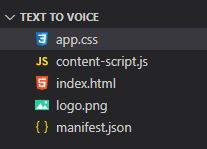
- Manifest.json
- Index.html
- App.css
- Content-script.js
- Logo.png
III. Implementing the Text-To-Speech functionality in chrome extensions
Before implementing TTS in our chrome extension we have to configure our manifest.json file first like below.
1. manifest.json
The manifest.json file is basically how the browser loads various permissions and resources. Here you tell the browser what version of the extension you’re loading, as well as the extension’s name, author, and description. When the extension is correctly loaded, these can be viewed in the browser.
{
    "name": "Text To Speach",
    "version": "1.0.0",
    "description": "Read Anything on Medium",
    "manifest_version": 3,
    "author": "Udara Liyanage",
    "action":{
        "default_popup": "index.html",
        "default_icon": "logo.png",
        "default_title": "Text To Speach"
    },
    "icons": {
        "128": "logo.png"
    },
    "content_scripts": [
        {
        "matches": ["<all_urls>"],
        "css": ["app.css"],
        "js": ["content-script.js"]
        }
    ]
}
2. Index.html
The purpose of the index.html file in Chrome extension development is to provide the structure and content for the extension’s user interface. The index.html file is typically the main file that is loaded when the extension is opened and is used to define the layout, design, and functionality of the extension’s interface. It can include elements such as buttons, forms, and text, and can be styled using CSS. The index.html file is also used to include any necessary JavaScript files that provide additional functionality for the extension. Essentially, the index.html file serves as the foundation for the extension’s user interface and plays a crucial role in the overall functionality and user experience of the extension.
But in our case we are not going to use index.html file much. Because in this article we focus more on the content-scripts.
You can edit your index.html file like below.
<!DOCTYPE html>
<html>
<head>
    <title>Welcome to text to Speech</title>
    <meta charset="utf-8">
</head>
<body>
    <script src="scripts.js"></script>
</body>
</html>
3. Content-script.js
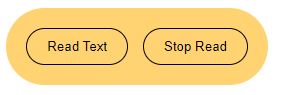
This is the main file we use today. In this step we are going to create a user interface first. The thing is we are in Js file. So we cannot use html tags. But don’t worry. We can develop everything using JavaScript as same as the html.
This is the interface we are going to create.
const divs = document.createElement("div");
divs.setAttribute("id", "mainbox");
const para = document.createElement("p");
divs.appendChild(para);

const button = document.createElement("button");
button.innerHTML = "Read Text";
button.id = "ReadMeButton";

const cancelButton = document.createElement("button");
cancelButton.innerHTML = "Stop Read";
cancelButton.id = "MuteMeButton";

divs.appendChild(button);
divs.appendChild(cancelButton);
Then we need to add these boxes inside the body tag of any page you are browsing. To do that you need to add below two lines into above script.
const element = document.getElementsByTagName("body")[0];
element.appendChild(divs);
Now we have a problem. The problem is how we catch the text. This method may be different for your case. In my case I use medium posts. The thing you have to do is just open your blog site that you need to add text to voice, within the inspect element. In chrome you can do that by right clicking on the page and then selecting ‘Inspect”.
Then you have to identify your main article tag name or Id or class name. In the medium they used the ‘article’ tag for their blogs. So add below line for fetch the text form blog that you need to text to voice.
const ptags = document.querySelector('#root article section');
Now we need to make the buttons work. For the ‘Read Text’ button,
document.getElementById("ReadMeButton").onclick = function() {readText()};
function readText(){
    const childern = ptags.childNodes;
    childern.forEach(ptgs => {
        console.log(ptgs.innerText);
        window.speechSynthesis.speak(new SpeechSynthesisUtterance(ptgs.innerText));
    });
}
And for ‘ Stop Read’ Button,
document.getElementById("MuteMeButton").onclick = function() {StopText()};
function StopText(){
    window.speechSynthesis.cancel();
}
Here is the full code.
const divs = document.createElement("div");
divs.setAttribute("id", "mainbox");
const para = document.createElement("p");
divs.appendChild(para);

const button = document.createElement("button");
button.innerHTML = "Read Text";
button.id = "ReadMeButton";

const cancelButton = document.createElement("button");
cancelButton.innerHTML = "Stop Read";
cancelButton.id = "MuteMeButton";

divs.appendChild(button);
divs.appendChild(cancelButton);
const element = document.getElementsByTagName("body")[0];
element.appendChild(divs);


const ptags  = document.querySelector('#root article section');

document.getElementById("ReadMeButton").onclick = function() {readText()};
function readText(){
    const childern = ptags.childNodes;
    childern.forEach(ptgs => {
        console.log(ptgs.innerText);
        window.speechSynthesis.speak(new SpeechSynthesisUtterance(ptgs.innerText));
    });
}


document.getElementById("MuteMeButton").onclick = function() {StopText()};
function StopText(){
    window.speechSynthesis.cancel();
}
4. App.css
It’s time to make the interface nice. To that we use a css file. You can have any style. I put my style css below so you can copy it.
p{
    font-size: 20px;
}

#mainbox{
    width: "100%";
    height: "100%";
    position: fixed;
    top: 20px;
    right: 20px;
    background: #ffd371;
    padding: 20px;
    border-radius: 50px;
}

button{
    border-radius: 20px;
    padding: 10px 20px;
    border: 1px solid #000;
    background: #fff;
    color: #000;
}
#MuteMeButton{
    margin-left: 15px;
}
5.logo.png
IV. Testing and debugging the chrome extensions
It’s time to upload our program to Google chrome. Before that we need to put all the files that we created into a single folder. You can named it as what ever you want. I named it as post4. And I attached below the file structure of our program.
Now open your chrome browser and click on 3 dots on the chrome window right top corner and then select more tools and then click on the Extensions. Or you can simply click here to open your extensions.
Click on the Load Unpacked button from the page that you opened in the above step and then select your root folder of your extension. ( In my case I had to select the Text To Voice folder and Uploaded It ).
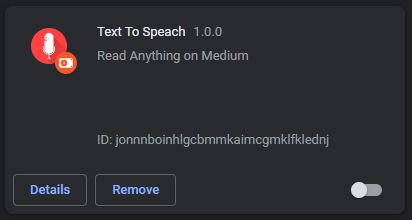
Now you can see your extension in your extension page. And switched it on.
You can see the extension icon on the address bar of the browser now. (3rd icon in the toolbar below in my case).
Then click on that icon and select your extension and pin it on the toolbar. After that you can experience your chrome extension.
V. Conclusion of Chrome Extensions Development
In conclusion, developing text-to-speech Chrome extensions are straightforward process that can be accomplished using web technologies and the Chrome browser. By integrating text-to-speech and implementing features such as a trigger button, it is possible to create a useful tool that allows users to listen to web content. Testing and debugging the extension during development is important to ensure that it is functioning correctly. Once the extension is complete, it can be packaged and published to the Chrome Web Store for others to use.
If you are interested in customizing or extending the functionality of the text-to-speech Chrome extension, there are a few approaches you could take. For example, you could add additional options for controlling the playback speed or pitch of the spoken text. You could also integrate the extension with other tools, such as a bookmarking service or a translation service. With a little creativity and some basic coding skills, the possibilities are endless!
Previous Articles of chrome extensions development